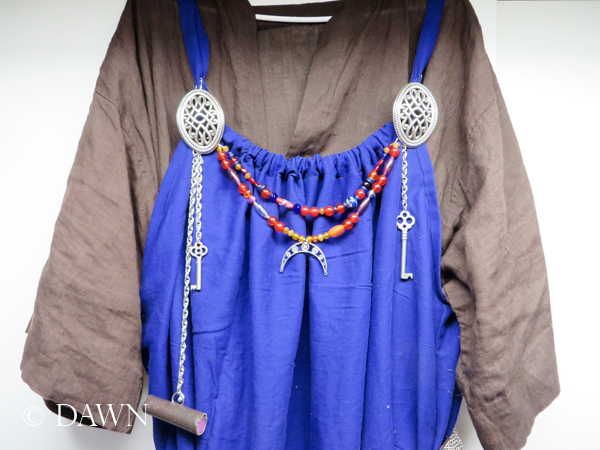
Brown linen under tunic, blue cotton apron dress with festoons & ‘turtle’ broaches
The other day I shared a quick, simple ‘pillowcase dress’ I had made – but I had an ulterior motive in making it (other than it’s just super quick, simple, cute, and really low-waste). I wanted to see how it would work as an attempt at an early-period Viking ‘Apron Dress’.
I had the ‘pillowcase dress’ in the back of my mind, but then when I was looking at early-period (tube-style) Viking Apron Dresses, combined with the “reasonable attempt” bog dress from A Wandering Elf, (An option she suggests would be reasonable for Celtic or Norse, although not documented, but still easy to make, and light and cool to wear for summer or hot-weather SCA/ Faire events) and the super-pleated, full apron dresses inspired by the documented find from Köstrupkjolen. (Links are in Norwegian.) I thought this might be another “reasonable attempt” and fit a “view from a distance” standard. (And something I would wear for the mundane world, but definitely not documentable.)
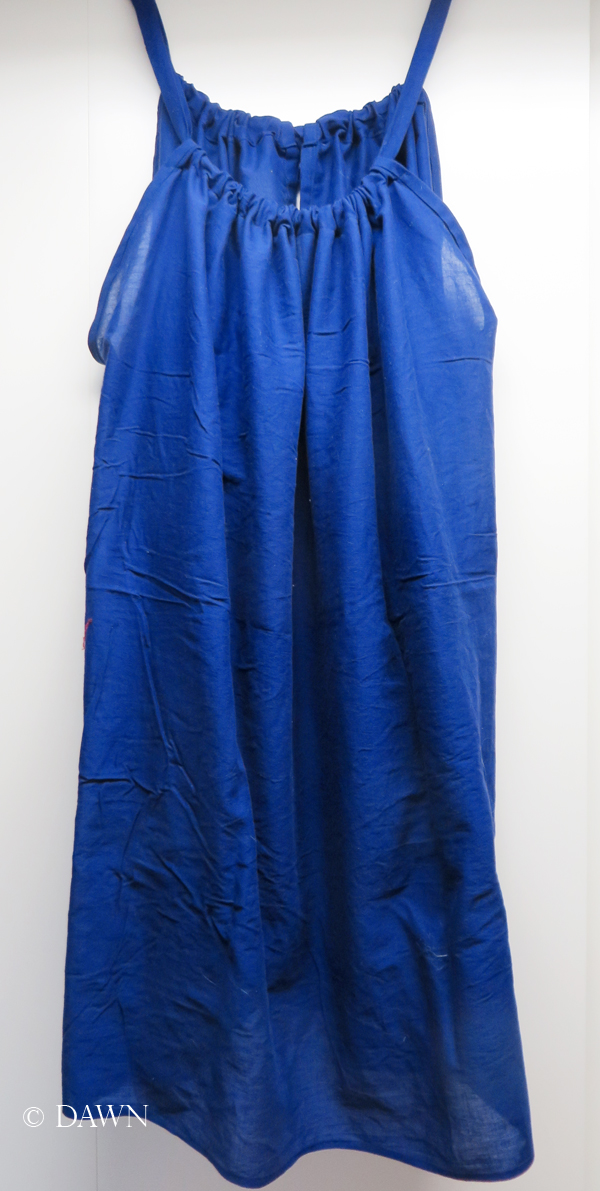
The finished “Pillowcase dress” without adornment
Now, my version deviates in a number of ways… none of the inspirations involve gathering – they all involve pleating. Their pleats are held in place with banding or stitching, and then straps (or pins/broaches) are attached for the shoulder straps. My version uses a drawstring which I don’t think is at all period whatsoever. Still – from a distance, and once all of the other costume elements are added… I think it LOOKS good. Ren Faire or dress-up party good that is 🙂
Once I got the pattern dimensions correct though (figuring out how long to make the shoulder straps in relation to the arm holes, for instance, and how wide I wanted the band at the top – this could easily be re-done with pleating and pinned straps instead of a drawstring, with nearly the same (from a distance) effect. (Although up-close it would look significantly different pleated vs. gathered.)
Since it’s a very, very low-waste pattern as well, I think it fits that goal, and although I made my first version in cotton, it would also go together well in linen (especially if pleated… hmmm pleated linen… ) (I also know my keys and broaches aren’t right.. but it’s a start!)
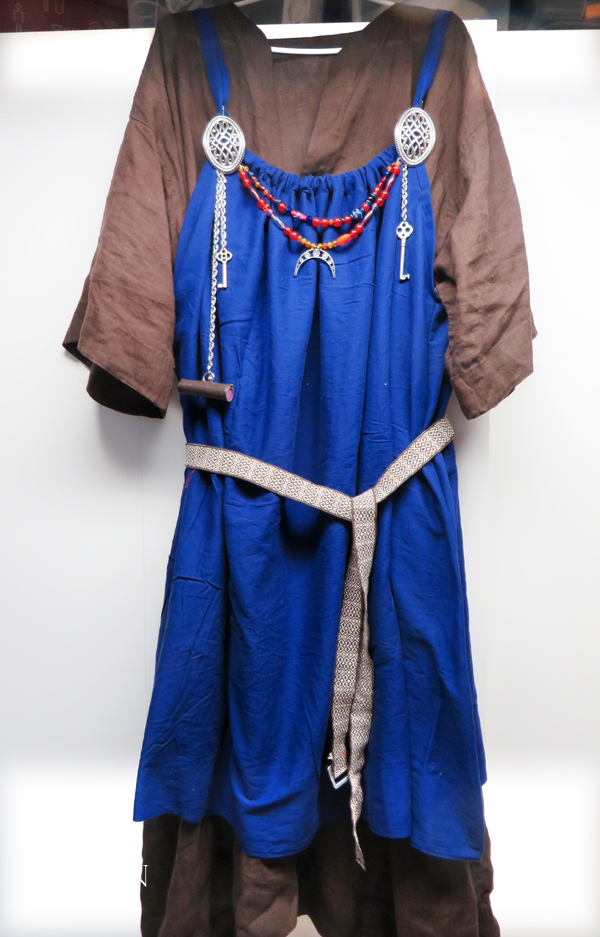
Brown linen under tunic, blue cotton apron dress with festoons, ‘turtle’ broaches, & ‘tablet woven’ belt
In the photo above I’ve re-used a buckled belt as a tied belt just to get the photo… for costuming I’d replace it with a similar tied belt. The braid used for the belt is commercial bought, but I thought it was a reasonable approximation of tablet weaving, since I haven’t learned that, nor had the chance to buy any “real” tablet weaving… yet. The festoon is from a previously written post.
What do you think?
If you’re involved with Viking recreation – what do you think of my attempt? Do you think it meets the “reasonable attempt” criteria?
I posted one of the photos on the Viking Clothing (SCA-style) group on Facebook (which I found thanks to the Wandering Elf’s blog) and most of the comments were about the accessories instead of the apron-dress. Some of the areas for improvement (other than what I already identified) included:
- Not using the belt with a buckle – yep, that was more just to have a belt, more so than to use that one – I have plans to make another tied belt out of a similar braid.
- The longer key chain could be shorter to be less in the way when worn – a reasonable suggestion; I’ll wear it and see if it’s ever in the way and adjust from there.
- The white belt is for chivalry – the belt is actually a cream and brown braid – but if it looks white in a photo, then it might look white in person from a distance too – on the agenda- make sure the braid I use for the next belt is dyed! 🙂
- The short-sleeved underdress should be fine – and for cooler weather I can wear a long-sleeved dress under it – which I have!
- The gathering is what appeared the least authentic part of the outfit to one poster, who had recommendations for a form-fitting tube dress, a “double C” wrap dress, a wrap front dress, a split open front, and the pleated version that I was considering in my ‘inspiration’. The same poster went on to elaborate that there was only one example of a pleated apron dress, with pleating only between the broaches, and done perpendicular to the body (like cartridge pleats) rather than knife pleats.
- Read all the comments here: https://www.facebook.com/groups/624164817603195/permalink/813216098698065/
So.. I’ve got lots of options for changes – but also a few thumbs-up so far for the “reasonable attempt” for an upcoming event I am hoping to attend!


