Creative Stitches & Crafting Alive 2016

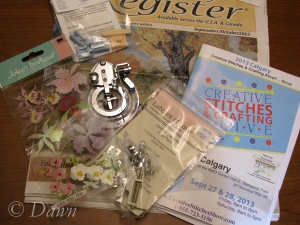
I only got a few things at the 2013 Creative Stitches show

I only got a few things at the 2013 Creative Stitches show

I’ve written in the past about the Creative Stitches & Crafting Alive trade show… in the past I really enjoyed the show, but over time it became less about sewing, and more about scrapbooking. Originally there were a number of free-to-attend classes and workshops, along with a few paid all or half-day classes… then it seemed to move to free “classes” that weren’t much more than sales pitches, and more paid classes. The vendors also seemed to shift away from the good out-of-town fabric and notion stores I adored (Gala Fabrics from Victoria, Great Notion Supply from Abbotsfort/Surrey, etc) and had more of the regular “women’s show” trade show vendors… less interesting to me.

So for several years I haven’t bothered to attend.

All the same… there is a class on redwork at the Calgary show this time around, as well as a few others, and I thought I’d share it to my local readers.

Continue reading

Return to Marshall’s Discount Fabrics in Edmonton

Quilting cottons at Marshalls

Quilting cottons at Marshalls

A while back I visited Marshall’s  in Edmonton, and recently returned. I picked up a few different things, but before sharing those (and hopefully some subsequent finished projects too!) I figured I would share some updated photos using a real camera instead of just my iPhone!

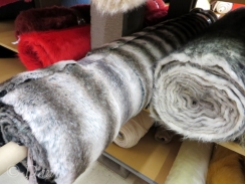
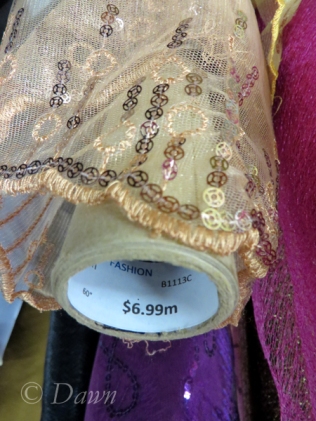
Marshall’s has big areas for quilting cottons, fun fur, fleece, and home decorating, with smaller areas for knits, fancies, and other fabrics. Despite the name, I found the prices for the items I looked at to be no better than a lot of other fabric stores – certainly not the “discounts” I hoped for!

Marshall’s Discount Fabrics

10003 63 Ave NW, Edmonton, AB T6E 4Z2
(780) 436-3739

Migrating purple geese quilt

"Migrating Flying Geese" quilt top in purples, pinks, and greys from the Jelly Roll fabric selection

“Migrating Flying Geese” quilt top in purples, pinks, and greys from the Jelly Roll fabric selection

After getting well under way with the Modified French Braid quilt, I started work on the quilt using the purples and dark pinks from the Moda Jelly Rolls that I had picked up.

Like the other quilt, I got my pattern/idea from Pinterest, rather than going back to the Jelly Roll ideas I had pondered back in December 2011 when I first was interested in Jelly Roll fabric collections. Of course, the problem with just looking at pretty pictures instead of actual quilt patterns, is that I don’t really know the names of any of the patterns, or have any of the techniques – so I sort of have to make them up myself!

Continue reading

Modified French Braid quilt

Modified "French braid" quilt top in green, pink, purple and white.

Modified “French braid” quilt top in green, pink, purple and white.

As I wrote in Jelly rolls (and other baked goods), after picking up small batik Jelly Rolls of quilting fabrics (and subsequently making two mini quilt tops) I finally hunted down two real quilting Jelly Rolls along with two coordinating prints from a quilt shop.

The colours in this Eva by EverGrey from Moda fabrics were mostly lime greens, pale and bright pinks, purples, burgundy, and a few blacks.  While I liked the majority of the colours, the greens didn’t really appeal to me. I decided to split the rolls (I had bought two) to combine the purple and darker pink/burgundy fabrics together, and then the greens, pinks, and blacks together.

From there I went to Pinterest…

I did some searches for “Jelly Roll Quilts” on Pinterest, and came up with a few ideas (along with the same ideas I had thought about when I wrote Peanut Butter Jelly Roll back in December 2011 when the notion first caught my attention.

I started off with the greens, and a design inspiration that looks like a modified (blown out) French Braid block/method.  The original creator (who blogs at “Anne & Will” made this up as a baby quilt with three shades of blue, two shades of green, orange, yellow, brown, and off-white fabric.  Of course, I didn’t see her tutorial until after my top was already completed.. but she started with strips 4.5″ wide, where as my strips are only 2.5″ wide from the Jelly Roll.  Since I didn’t see her instructions, I ended up starting with the French Braid method from the Quilters Cache instead, and then just modifying it to be similar to what the inspiration photo suggested.  The ‘original’ French Braid uses short strips all the same length, and then trims off to make one narrow strip of ‘braid’ – but I liked this stretched-out variation better.

Piecing the quilt top

Modified "French braid" quilt top in green, pink, purple and white.

Modified “French braid” quilt top in green, pink, purple and white.

I started out with two very short strips of fabric for the starting triangle, and then little by little added in the additional strips alternating from one side to the other.  Sometimes I did multiple strips on one side, and once in a while I’d throw in a narrow strip too.  When the quilt was about as wide as I wanted, I trimmed three edges square, and then started working downwards instead. Really, that’s as about as much planning went into this.  I did arrange my fabrics so that it would start out mostly dark, then green, then pink – but really when it got nearer to the end, I mostly was looking for strips that were long enough, more so than being super concerned with the colours.  I also reserved 6 strips for the back/binding.

The backing

Modified "French braid" quilt back - just a pretty pink, purple and off-white stripe.

Modified “French braid” quilt back – just a pretty pink, purple and off-white stripe.

Once the quilt top was done, I just stored it away for a while.  I wanted some time to mull it over – and to come back to it being excited about it again, rather than picking apart everything that I’d done not-quite-right.  I picked out some great pink striped fabric to bring the pinks out in the quilt (It’s “London Cats” by Benartex). I sandwiched the quilt top and backing around some quilt batting (the low-loft needle-punch cotton batting versus the high-loft polyester fiber-fill kind of stuff), quilted along some of the diagonal lines, and then moved on to binding.

I bound the quilt using some of the leftover pink and green printed fabric strips, by sewing them, turning and pressing, and then hand-stitching them in place. I tried doing it by machine completely, and just didn’t like the result.. oh my poor fingers!

For the purple fabrics…

Once the majority of the quilt top with the greens and pinks was complete (and I had to stop because I needed to find the backing fabric) I moved onto the remaining fabrics from the roll; dark pink, purple and burgundy fabrics.  I’ll write more about this in another post.

On-point Jelly Roll

It seems like ages ago that I first wrote about the half-sized batik jelly rolls that I picked up… it was actually back in December 2011, and although I started the top back then, I only finished not too long ago.

up close - on-point jelly roll quilt

up close – on-point jelly roll quilt

Where it all started

In my various fabric-store wanderings, I kept being attracted to Jelly Rolls – the rolls of narrow strips of fabric pre-made by fabric mills/fabric designers especially for quilters.  I know that at this point, Jelly Rolls are a bit out-of-date, but I’m also late to the quilting party, so bare with me! As much as I liked them, I didn’t love the price point – most of them were in the $40-50 range, which seemed expensive to me (considering I’d also want to pick up coordinating fabrics, etc…) so I held of picking one up for a long time.

Then, when out at a department store, I found much more affordable rolls – only $15 for a variety of batiks including medium blue, bright blue, green, orange, purple, and pink along with a few fabrics with multiple colours dominating the design.  It wasn’t until I got one of them home that I realized that they were only half-sized rolls, so I went back to pick up a second.  (Plus, I wasn’t interested in using all of those colours together in one quilt).

Continue reading