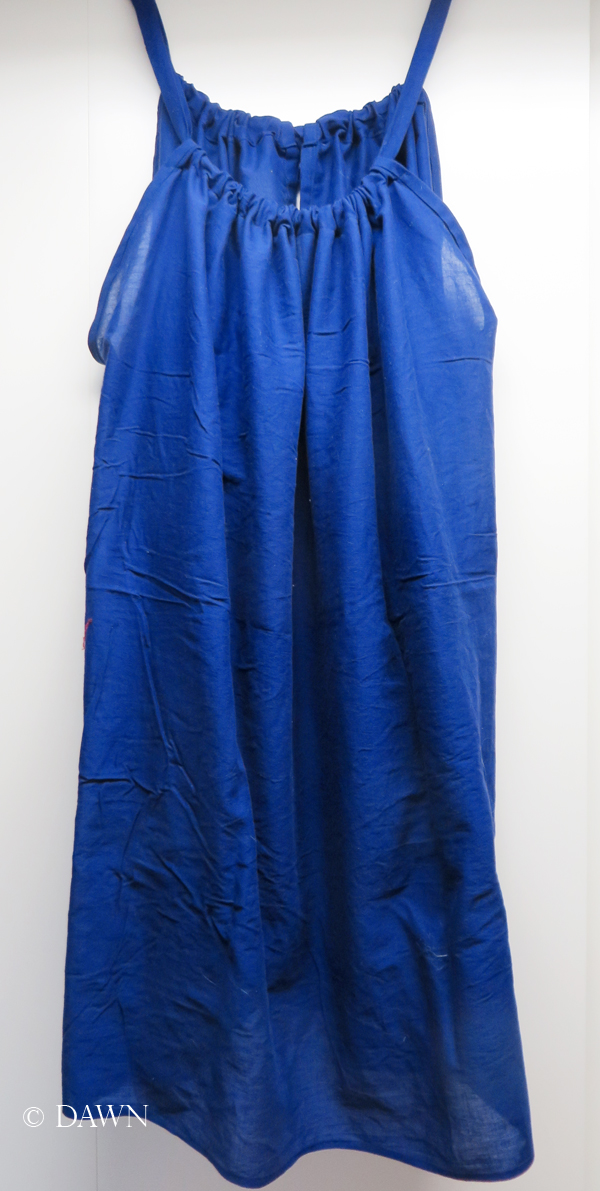
The finished “Pillowcase dress” (I probably should iron it before photographing it…)
I saw a few examples of the “pillowcase dress” (or top, nightie, etc) on Pinterest, and actually really thought it was cute for a super-casual summer dress, top, or tunic, so the other day when I was on a sewing spree, I figured I would make it up.
I wanted to see how it would work first off, so I picked some leftover fabric from another project. I’m pretty sure I picked up this blue cotton from one of the East Indian stores (Reena’s probably) for super-cheap, for some costume I made for a friend-of-a-friend when we attended an SCA event years ago. I picked it for him because it was a good colour, super light, and yep… cheap. It’s similar to a cotton batiste (actually it probably is a cotton batiste…)
Pattern.. we don’t need no stinking pattern….
First I cut off three strips of fabric from the raw edge – these would become the straps for the dress. They were sewn end-to-end, and then into a tube, and then turned. I didn’t even finish the edges since I used the selvage on the tube ends.

Pattern drawn on folded fabric with chalk (and and then drawn on in Photoshop so you can see it better)
Really I just guessed and estimated on where the lines should go. I folded the fabric in half, then half again the same direction, so I could cut the front and back in one go. I drew the lines on with chalk, but for this photo (above) I’ve drawn the lines on with Photoshop so you could see them better. From the leftover ‘scraps’ I cut not-quite-bias strips which would become the arm binding, and a straight strip on grain to bind the back neck. This resulted in very, very, very little waste at all.

Cutting a slit for the back neckline
Next I cut a slit in the back panel, about 6 inches down, in the center top where the neckline will be. I just did this freehand as well. This will make the ties go in the back instead of the shoulders – like in this example from the Sew Tessuti Blog (originally found on Pinterest).

Binding the back neckline
I bound the neck slit the same way you’d bind the placket on a cuff for the most part – really super-simple and not tailored at all. This fabric sewed up so nicely – I really didn’t need pins at all for the most part. Binding was super-easy too, because this fabric presses so nicely. I basted the binding by hand, and then finished it by machine – the sheerness of the fabric meant the hand-binding went really quickly.
The finished “Pillowcase dress”
Next I sewed the side-seams, using an enclosed seam technique usually used for sheers (mostly because I was lazy and didn’t want to change my serger thread, but also because this fabric is semi-sheer and it does look good, plus nicely secure) followed by binding the arm holes with the nearly-bias strips I had cut from the ‘waste’ fabric. Then it was just a matter of sewing down the top edges to create the casing for the drawstring. I didn’t even have to finish this edge because it was on the selvage! The hem is also on the selvage, and for the time being I’m leaving it unhemmed as well – we’ll see how it wears this way; I may need to add a hem just to give it some weight in the future.
The result
I’m really happy with the result; as a simple summer dress or tunic it works perfectly. It’s light and airy, and with all the gathering I didn’t find it too sheer – though let’s see how that turns out in the bright summer sun. It would also work well for a nightgown, and shorter for a simple top.
The day after finishing it, I actually started cutting out another version.. though this time in a gorgeous super-light-weight satin.
But… I also have another thought for this blue cotton version… which I’ll share in a few days…
