In the fall I was out in Canmore and after my best friend ‘dragged’ me into an art gallery, I couldn’t help but purchase a beautiful painting from The Avens Gallery.

Can’t Stop It on display in the window at the Avens Gallery.
The painting is called “Can’t Stop It” and it’s by a local Southern Alberta oil artist, David Zimmerman.
(I also totally loved Jo Ludwig’s glass vessels which were on the ledge below – but they might just have to wait before joining my art collection!)
The gallery staff explained that David started with a layer of real silver and gold leaf under his oil paintings, which brings an extraordinary shimmer and shine – a sense of brightness and light behind the colours. They also explained that the painting was coated/sealed with a clear ‘resin’ which would not yellow or crack with age, but left a smooth, glossy, highly-reflective finish. (Which really shows off the shimmer and light behind the colours.) I was totally in love with the painting, and right now it’s hanging up proudly in my living/dining room. (If only I had better lighting set up to show it off!)
Inspired!
Of course, I loved the look of the painting, and thought that perhaps I might give the technique a try.
Step 1 – applying the foil
The first canvas
I had two canvases (which I had actually planned on using for something else…) and the first I prepared by underpainting with black. I don’t work with oils, so I used acrylics…
Once the paint was dry, I roughly sketched out the basic outline of what I wanted to paint, and then coated the canvas with glue where I wanted the foil, and then applied the foil mostly according to the instructions. (The shop where I bought the foil didn’t have any specific foil adhesive or sealer, so I had to improvise.)

Foil applied to the first canvas over the black underpainting
I waited overnight, and then brushed off the loose silver leaf, and then put a glossy acrylic medium over the foil to seal it, ready for the painting I’ll be doing next. The medium didn’t work as I thought it would – it puddled on top of the foil, since the foil isn’t absorbant in any way.
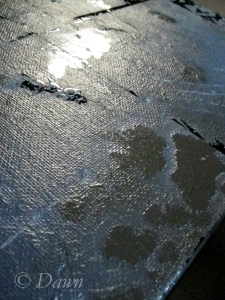
acrylic medium puddling up on top of the foil
The second canvas
The second canvas I underpainted with blue and red for a different painting. Rather than waiting for it to dry and then coating the canvas with glue… I thought I was being clever, and applied the foil to the wet paint. This really wasn’t a good idea, because the paint took a LOT longer to dry – and I started touching it too soon, breaking the foil.

foil applied to the red and blue painted canvas
The third canvas
Since the paint-as-glue technique didn’t seem to be working, I went out to a different shop and picked up the foil adhesive (which has a REALLY long ‘wet’ time and stays tacky forever!) and the foil sealer. I took my third canvas, painted it black like the first one, then applied the adhesive. When it was tacky (within half an hour) I carefully (way more carefully than the previous two attempts) applied the foil to the areas I wanted foiled.
Step 2 – Painting
The third canvas

Silver painting work-in-progress
Here’s the painting as a work-in-progress, where I have painted in the foreground hill, the background rock wall, the background trees, and the foreground tree. I love that in the photo you can even see the shine of the foil through the blue paints – though the colours aren’t as intense as I would like… This might require more work (on another painting…!)