
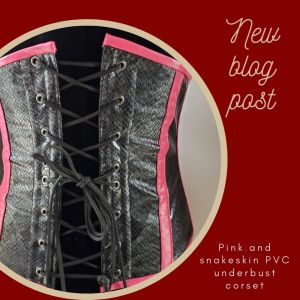
The finished back of the pink and snakeskin PVC underbust corset on my dressform.
Back in 2020 I made a pink PVC hobble skirt for a friend, and with the leftovers I also made a circle skirt for myself as well. There were still a few scraps left over which I hung on to… just in case. (Although I give most of my leftover fabric to a friend who sews doll clothes, things like PVC I usually keep because moderate sized scraps often come in handy.)
Well, I hadn’t seen my friend in several months, but then they were coming to visit in late January, so I figured I’d try to “whip up” a corset for them, using the hot pink PVC leftovers as exposed (decorative, not functional) bone casings.
I originally planned on using a black PVC for the main body of the corset, but when I was going through my stash, all of my plain black PVC fabrics were really too thin to use for a corset – or too soft to handle the wear that the lacing would cause.
However, I had this black and super-dark silver snakeskin PVC (from a Medusa costume I did years and years ago) – and I had lots of it… enough for a corset for a friend, as well as one for myself if I still wanted to make another. Together with the pink PVC, it looked really neat, so I started drafting…
Fingers crossed

The side view of the pink and snakeskin PVC underbust corset on my dress form
Now… this is a bit of a challenge. I took my friend’s measurements back in late 2019, and with Covid being a thing… it’s entirely possible they’ve gained weight (so many people have!) however we had a casual conversation a few weeks ago and talked about buying pants, and it sounded like they still wear the same size soooo… fingers crossed.
They don’t sew, so hoping they could re-measure themselves… not super likely either.
Normally I’d also make a test garment before cutting into the very few little bits of pink PVC I have left (there’s not enough really in case this doesn’t work out). However, I wanted the finished corset to be a surprise, which is hard to do if I say “hey, here, try this on” with a test garment. Plus since we only see one another a few times a year now, it’s entirely possible that a test garment that fit today, might not fit the next time we see one another. And… with how long it takes to draft and sew a corset, it’s not like I could just whip it up during a visit…
So… I made this with my fingers crossed – and hope that my drafting skills are good enough to work off the measurements without a toile.
Luckily…. their existing corset is TOTALLY the wrong size for them – and they don’t mind a bit. Pretty clothes are more important than a perfect fit for their aesthetic.
Drafting
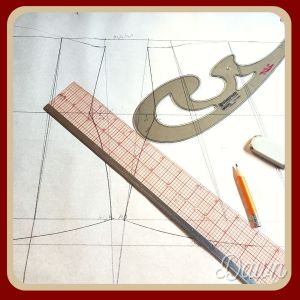
Drafting a new underbust corset for a friend
I drafted up an underbust corset using the same basic pattern I’ve made most of my corsets out of. It’s no compression at the rib cage, no compression at the hip, and only compression at the waist. In this case I aimed for a 4″ lacing gap, and about a 3.5″ reduction, mostly taken off at side seams, with a tiny bit at the front panels, back panel, and center back.
My friend’s waist and under bust (ribcage) measurements are the same, with fairly similar hips as well, so it’s not nearly as curvy of a pattern as when I make it for myself or for someone who either a) has more dramatic difference between under bust and waist, or b) myself.. (which.. is also a. LOL)
However, I’m sure they’ll wear it as tight as possible either way!
Cutting
I cut the fashion fabric, a plain black broadcloth lining, and a grey sportswear interlining to carry the boning channels. Although I’d be using the hot pink PVC for exposed boning channels on the outside, these would just be decorative, because the PVC isn’t strong enough to avoid the bones poking through (plus.. it has some stretch to it).

Cutting strips of pink PVC for the exposed bone casings
Since I can’t really pin into the PVC, I taped the pattern to the PVC instead, and then used the cut out PVC as a pattern for each of the other fabrics, to ensure that they were all the same size.
The sportswear fabric was a leftover fabric from a toile I made for the Elizabeth Woodville dress I made for another friend.
I never add seam allowances (ok, rarely) to my pattern, so for this I cut out each piece with a 1cm seam allowance at the sides, and zero seam allowance at the top and bottom (since I’ll be binding these edges).
I cut the exposed boning channels out of the hot pink PVC in 1.5″ strips, from the leftover scraps. Luckily as it turned out, I had just enough in my first go.
Sewing
Despite not having sewn a corset in years, this actually went together really easily. My friend is considerably smaller than I am which probably helped – much smaller pieces make for a faster project too!
From there I pressed all of the seams. The lining and interlining were pressed with the allowances to the side (in opposite directions to reduce bulk) while the fashion fabric seam allowances were pressed open (again, to reduce bulk since they’d be covered with the exposed boning channels). Pressing the sportswear and broadcloth was easy. Pressing the PVC required a lot of patience and a cotton pressing cloth since technically you’re not supposed to press PVC… (what with the plastic melting and all that….)

Strips and strips of pink PVC for the bone casings and the bindings.
I also pressed the hot pink PVC – folding each side so they’d touch, making the 1.5″ strips into a folded 0.75″ wide strip. In retrospect, I could have made this narrower, in terms of proportions for the corset. The finished 0.75 is what I’ve used on corsets for myself, but on a much smaller corset, a smaller channel would have possibly looked better? Of course, I used a press cloth on these strips too, as well as a metal ruler which I placed over the strip as it was cooling to help set the fold.
After pressing, I marked the waist on the lining, and sewed in the twill tape waist stay. Since I know my friend will be cinching this as tight as possible, this was a requirement as far as I was concerned!

Stitching the waist stay into the lining panels of the pink and snakeskin PVC underbust corset
I also sewed purchased bone casings along each of the seams of the interlining. While using twill tape (etc) is fine, I find ready-made bone casings really easy to work with, and really reliable in terms of not letting boning poke through.
Funny enough, I was actually on the phone with my friend as I was sewing this… they asked what I was working on, and I explained I was working on finishing a toile for a dress for myself… just because I wanted to sew, but didn’t want them to know about the surprise they’d be getting in a few days… if this all worked out that is!
Since I can’t really pin the PVC bone channels to the PVC corset (unlike woven fabric, the holes in the PVC don’t “heal” and would keep showing.) I ripped strips of painters tape, and used those to hold the boning channels in place while I stitched them down. Once they were, off came the tape pretty easily.


As an aside, I’m having even more problems with my sewing machine now… and think I’m going to have to take it in for servicing soon… but hopefully can get through a few of my UFOs before that happens!
Assembly
Next up is installing the center front opening. Rather than a traditional corset busk, I love using heavy duty industrial zippers. They hold up to the strain of corsetry just FINE, and are way easier to put on by yourself than a busk IMO, plus they have a cool look, are easier to get, and are cheaper. Win all the way around.

The interlining of the corset before layering
Next, I sewed the backs together (right sides together, with the interlining sandwiched in between) and turned it right side out. This got top-stitched to provide a place for the first bone to go, which won’t actually be inside one of the bone casings – but rather just the layers of fabric. This bone helps provide support for the lacing holes – so that the strain presses against the bone, instead of just one hole.
I also stitched the lines for the next bone (on the other side of where the grommets would go) and then sewed the layers of fabric together at the top of the corset just using a wide zig zag stitch. This keeps the layers in place when putting on the binding.

Marking and punching the holes for the grommets in the underbust corset
At this point I wanted to put in some (not all) of the grommets, just so I could see the finished shape on my dress form. Years ago I had a tight dress on the dress form, and my friend wanted to try it on. While it was very tight on them, it did fit – so I figured if it fit my dress form, it would be a pretty good fit on them too.
I placed the grommets at the waist a bit closer together (one of which goes through the waist stay), and then the remainder further apart. I punched the holes with my hole punch, and installed most of the grommets using my press. I didn’t install the top and bottom ones though, so I wouldn’t have to work around them while applying the top and bottom binding.

Trying the work-in-progress corset on my dressform
Like the bone casings, I pressed the PVC using a pressing cloth into shape, sewed on one side of the binding to the outside of the corset, and then carefully folded it back into place and held it in place with binder clips. Normally I’d either use pins, or baste it in place by hand, but because the PVC will show holes, so clips work instead. I know that there are specific “sewing clips” but binder clips work well too!


After the first set of binding was on, I selected my boning, and slid them into the channels that I put on the interlining layer. Then stitched that edge closed with a zig zag stitch as well, and installed the second set of binding the same way as the first. However, for this second side, I wore safety goggles, just in case as I was sewing I hit a bone with the needle.
Some finished photos
I can’t just fill this with work-in-progress photos right? Once my friend came for a visit, I was able to get them to quickly try it on for me just to make sure it fit – it did!
They’re not super curvy (their underbust and waist measurements are the same number, and their hip measurement isn’t significantly different either) So on the dressform it’s not a dramatic hourglass like with someone with more dramatic measurements (or more to “squish”!)
We also didn’t really tighten it a LOT – since it’s the first wear.
You can click on any of these to see them larger.


Come follow me
 Interested in seeing what else I’m making?
- If you have a WordPress account – subscribe to get alerted to new posts as they go up.
- If you’re on Instagram – follow me! You’ll see some finished projects but also lots of work-in-progress shots (and lots of non-costuming/ crafting / sewing things too.)
- Want to see all of my posts on Facebook? Come join me on Dawn’s Dress Diary! (I share every post from here – but also neat costuming, history, and sewing related links as well.)

[…] in January I made a silver/black snakeskin PVC underbust corset for a friend (as a belated Christmas gift) and while I was make it, I thought how cool it would […]