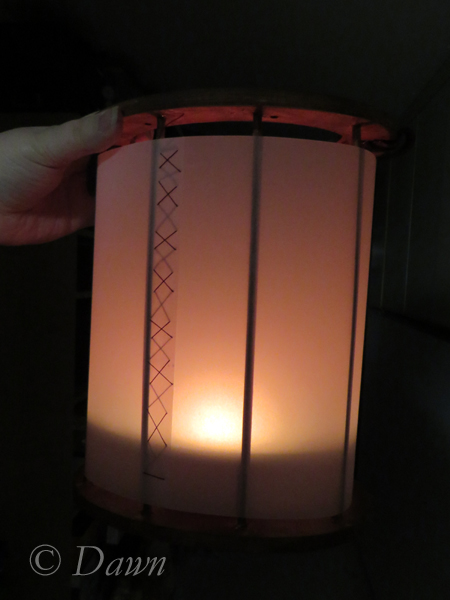
Lights off with a burning candle inside
In an earlier post, I mentioned that I had picked up a battery-operated lantern that I hoped to use with my Norse feast kit – for the time being, until another project was completed… well this is that project!
I’ve seen a few ‘medieval lanterns’ online, in particular on Pinterest, and figured that although there might be more complicated ways of making this, that I could probably make something that was similar, even without great woodworking skills.
Although it’s no where near as nice as some of the really well-made ones I’ve seen online, I’m actually really happy with how this turned out. I also wasn’t doing any research about the originals – its just a neat-looking lantern to add to my kit for the time being.
Want to make one too?
Supplies
Since I don’t have a jigsaw, nor a large bore drill bit (like for putting in doorknobs) I needed to find something that already had the candle-setting hole. I looked for round wood pieces – there were very thin balsa wood circles which I could probably cut easily, but they were so thin I didn’t think they’d work. There were thicker circles intended for clock faces, but the hole was really too small, and they were WAY too expensive for what they were as far as I was concerned.
Then I found some ovals – intended as picture frames they were thick enough, and were really quite inexpensive (less than $2.00/each). Although I would have really liked round ones, these were perfect otherwise, and I figured I could make it work!
So.. my supplies included:
- 2 wooden picture frames
- 2 pieces of dowel
- wood glue
- wood filler
- velum
- buttonhole twist thread
- leather strips
- staples
- small brass nails
- brown acrylic paint, black acrylic paint, pouring medium
My tools included:
- pliers
- drill with drill bit
- scissors
- plastic gloves
- stapler
- hammer
- clamps
- paintbrush, fabric scraps
I’ll also be adding a battery-operated pillar candle to the project as well – although I photographed the lantern with a real candle, a battery-operated one will be much safer, and more appropriate for the venues where I’ll want to use the lantern I’m sure.
Steps

setting the dowels into the top of the lantern
I started off by lining up my two photo frames, clamping them together, and drilling through the existing half-holes intended for the frame stand, and then adding additional holes evenly around the frames. I opted to drill all the way through both of the frames rather than trying to half-drill the holes, only because lining them up together would ensure they were evenly spaced.
I cut up my dowel, which I had purchased in a long length and the width to fit the frame-stand holes. I used a bit of wood glue, dipped a dowel into the glue, and then fit the dowel into one of the two frames.
From there I did the same to the other frame, dipping the dowels into glue, then putting them into place in the other frame. The fit was very, very tight, and I ended up cracking one of my dowels. I repaired it using glue – it won’t be nearly as strong as before, but it doesn’t have to hold weight.

Sanding pad leaning up against the top and bottom
Once I had the dowels in place and the glue was dry, I filled in gaps at the top of the frame and bottom of the other frame with wood-filler. Once that was dry I hand-sanded it.
In one case the dowel was a bit too long, so it took a lot more sanding to get it down to the right height!
Around here I removed the metal bits from one frame (which hold the picture in place) but left the metal bits in the other frame. The one without the metal will be the top, and the one with the metal will be the bottom.
After dusting off the wood filler and sawdust, I wanted to ‘stain’ the wood a darker colour, so mixed brown paint with a drop of black and a bit of acrylic pouring medium to make a ‘stain’. It’s not quite right, but it’s good enough for this craft project.
I also wanted to imitate the look of soot on the wood around the hole where the candle would go in, as if lighting and setting the candle had charred the wood slightly, so added darker paint around the opening of the lantern. I kind of like the look; I think it gives it some depth.


I read that a few crafters used rawhide, while others used artificial velum for their shades. I had some velum in my craft supplies, so pulled it out, cut it to size, and started stitching pieces of it together using pearl cotton embroidery thread.

“soot” on the edges of the lantern top, looking down inside of the lantern.
Once I had a long piece of velum, I pulled it around the frame, put glue on the overlapping pieces, stuck them together, and clipped them for the glue to dry. Once it was dry I completed the stitching to finish the shade.

Testing it out before the last few steps, with a burning candle inside
At this point I tested out the shade (oops, should have done that first!) by putting a lit candle inside the lantern – success! I took the photo to the left with the lights on, and the photo at the top of the post with the lights off.
Next it was time for a strap – I had two pieces of thin leather which are stapled on the underside, and nailed with very small brass nails on the outside in place. A piece of brass chain loops through the leather on either side and attaches back upon itself to form the handle for carrying.
And there’s my medieval-style craft lantern… without any real woodworking skills to speak of!

[…] in 2015 I posted about a medieval-inspired lantern that I made using photo frames and velum. Since I now have access to the laser cutter through the […]
What is the historical provenance of this artifact?
It’s not an artifact – I made it.